
Menu
This can be helpful if you’re wondering about:
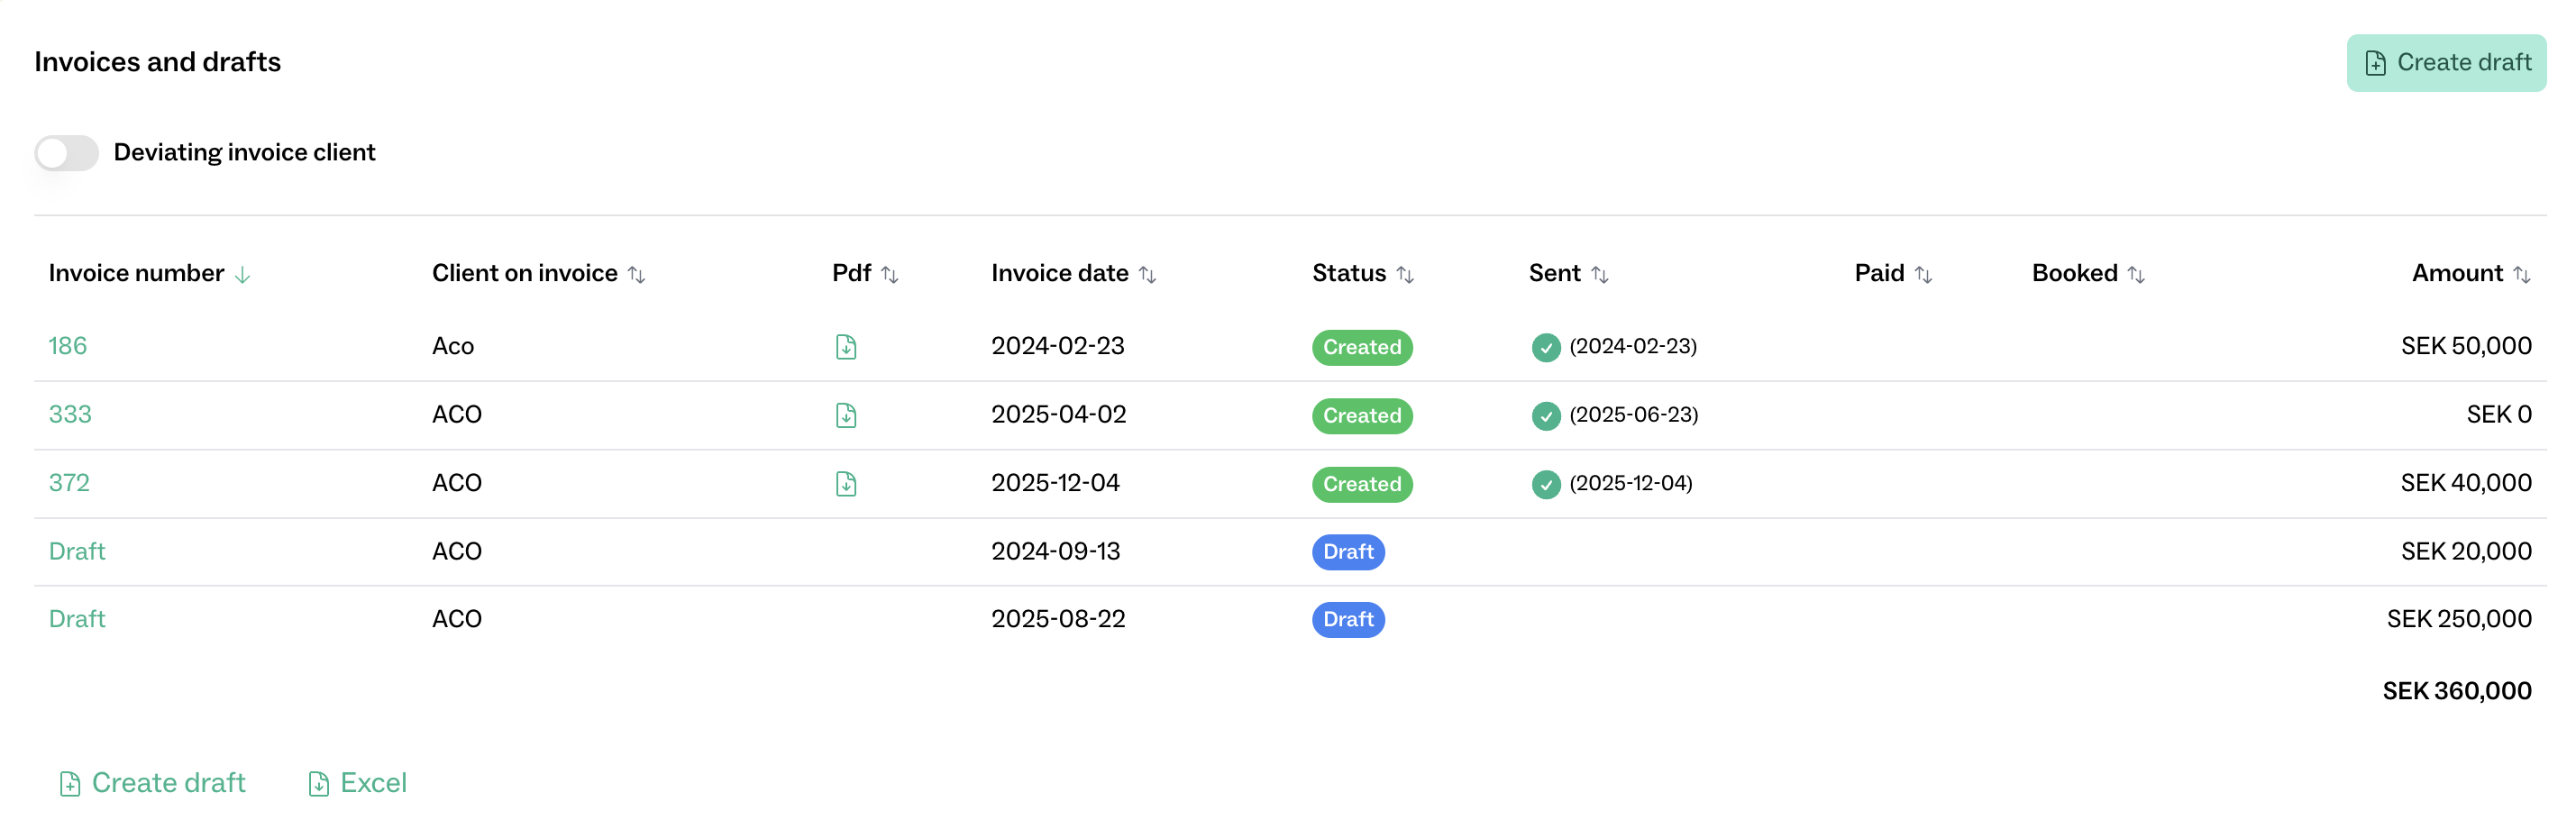
You can create, edit, review, and send invoices in Roughly Right. An invoice can be created for a single project, or as a collective invoice where invoice lines can be linked to different projects.
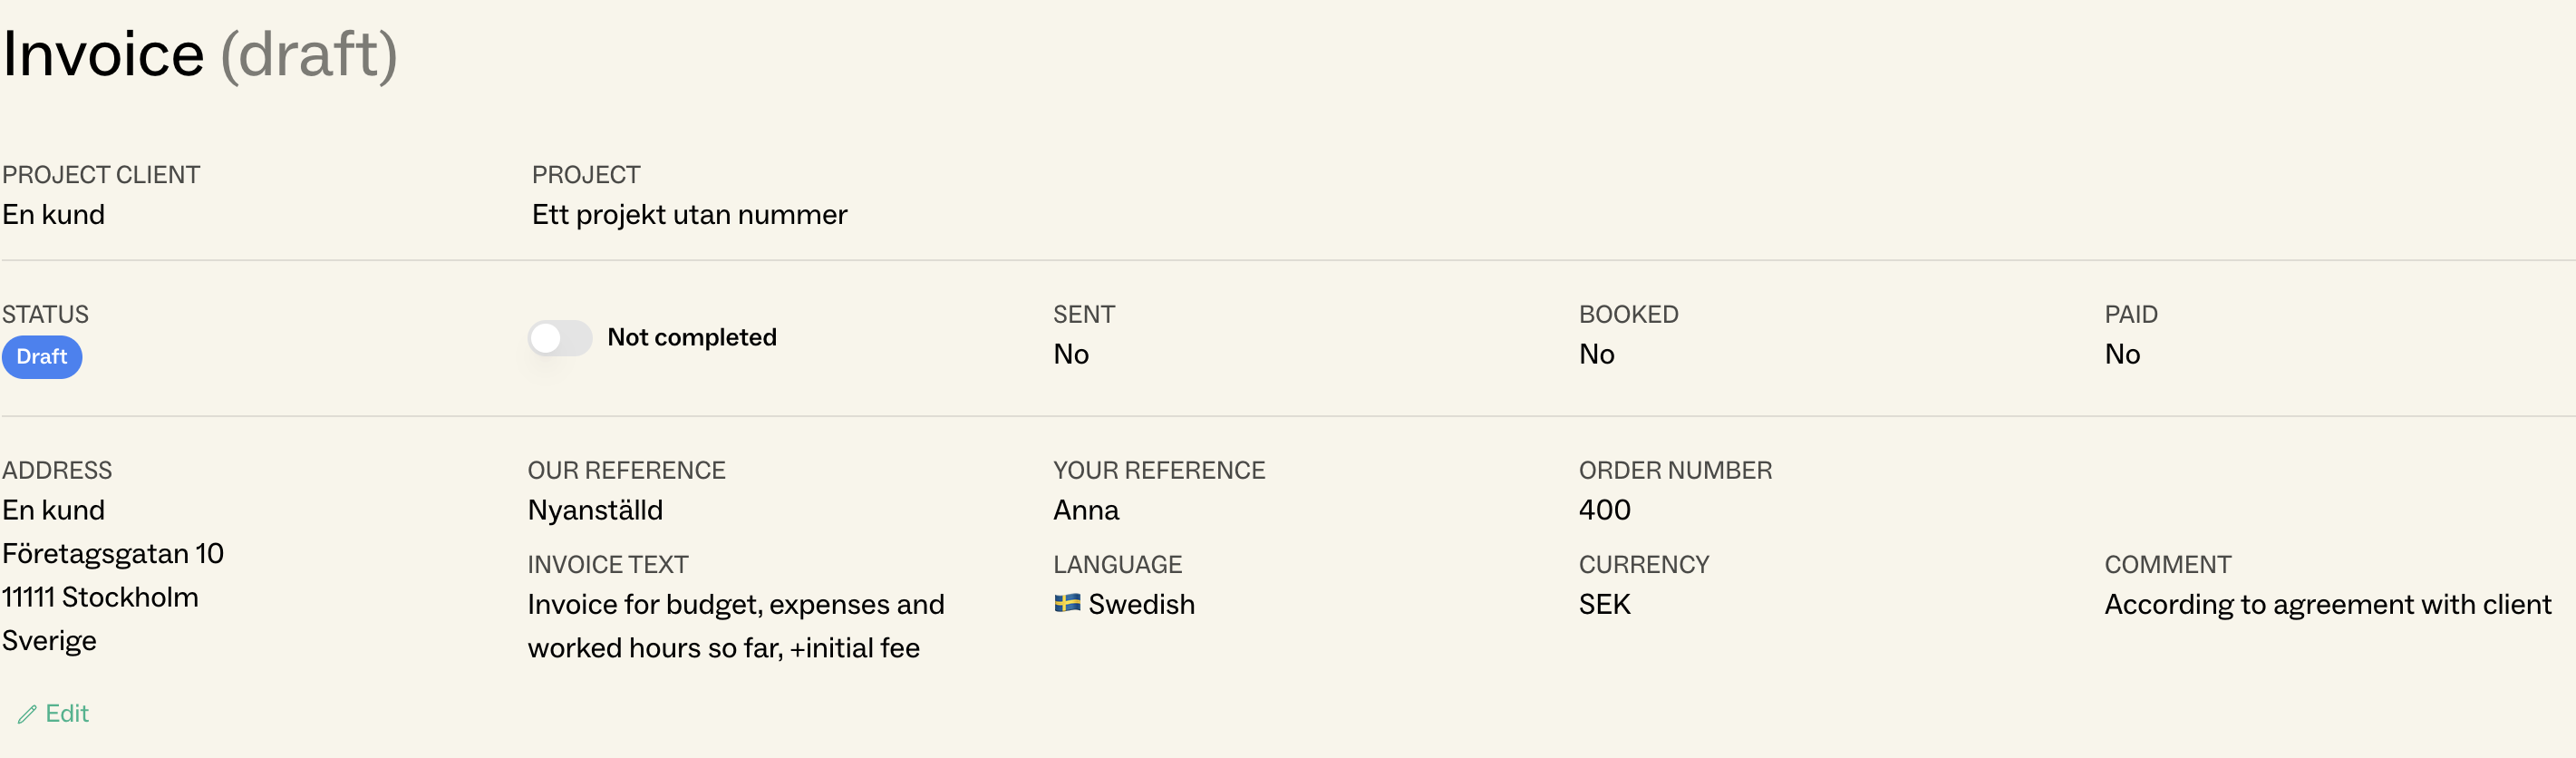
At the top of the invoice page, the invoice status is displayed:. You can also see whether the invoice is sent, booked, and paid.
In the next section, you can adjust information populated from the customer’s details, such as address, invoice language, and currency. Click Edit to make changes, or click directly on the field you want to adjust.
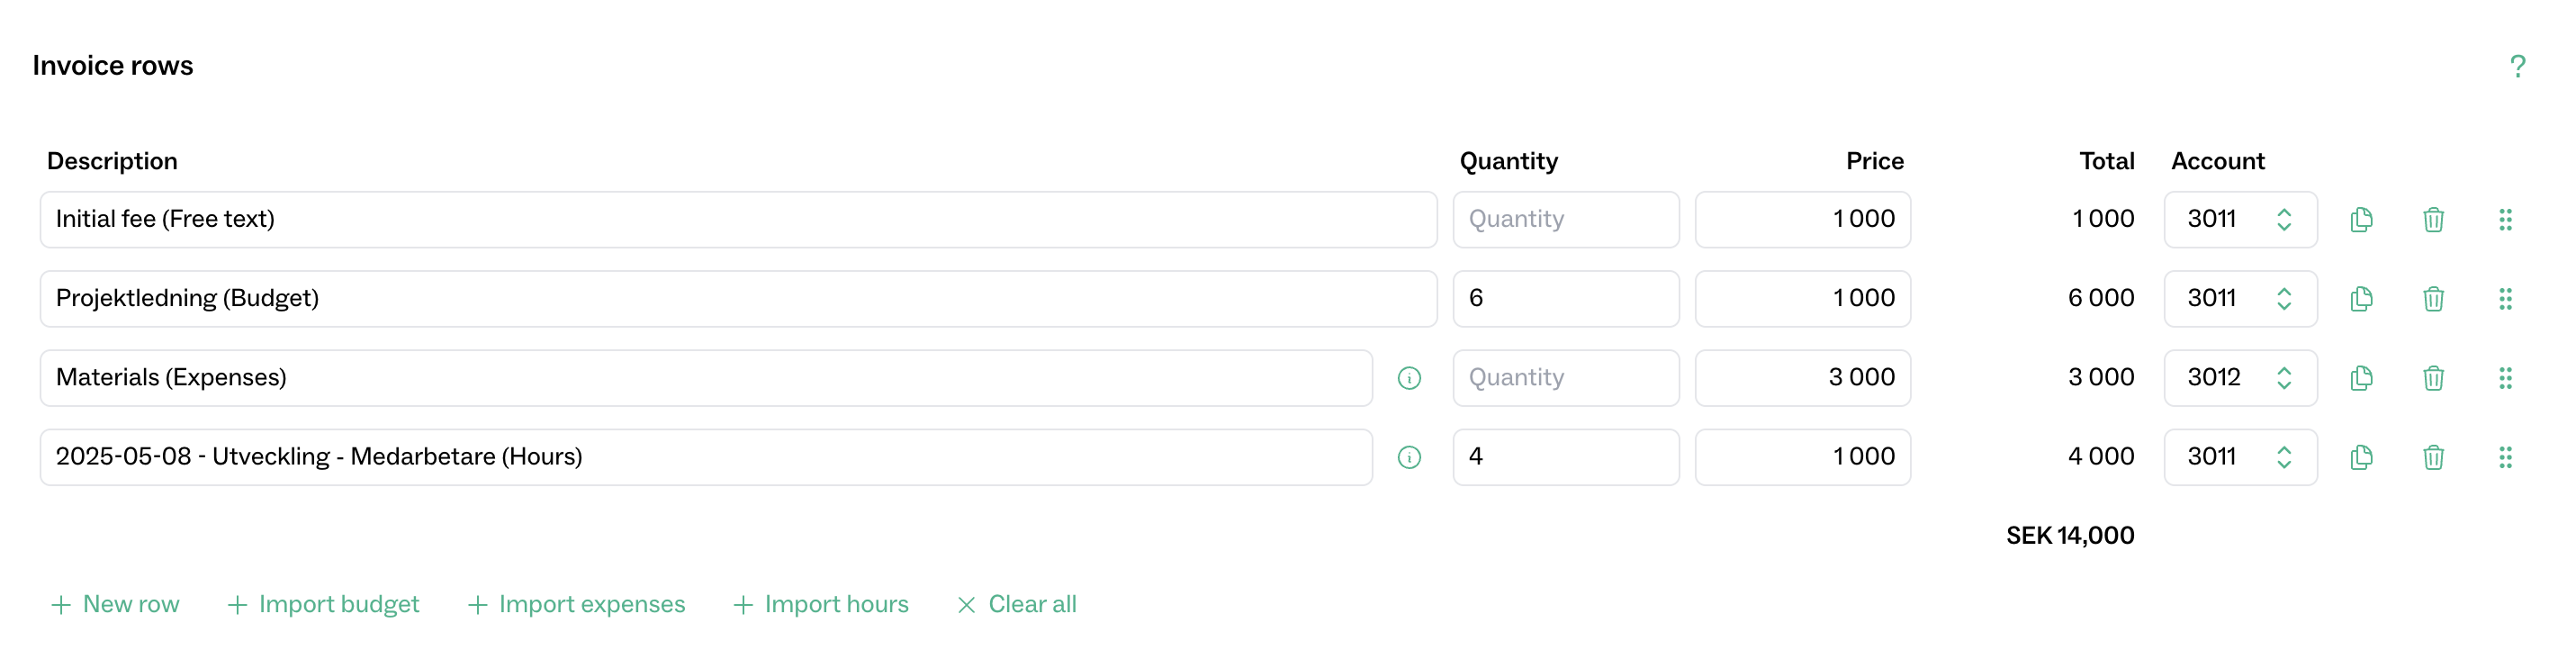
There are several ways to add rows to the invoice. Here we refer to them as Free text, Budget, Purchases, and Hours.
Click + New line to create a blank invoice row, then fill in the desired information. On a collective invoice, don’t forget to choose which project the row should be linked to. Quantity, Discount, and Account can only be entered if these fields are enabled via Basics.
It is possible to import row from a project’s budget i.e., the activities and expenses estimated for the project.
Once imported, row prices can be adjusted freely. Changes do not affect the values entered in the project’s budget.
Import expenses is similar to Import budget, but simpler and without grouping options.
Another difference is that the purchase’s Actual price is used instead of the Estimated price used when importing budget rows.
After importing, row prices can be adjusted freely. Changes do not affect the project budgets.
Import hours makes it easy to include reported time on an invoice.
Once imported, both price and quantity can be adjusted freely. Changes do not affect the underlying time reports.
Here you specify invoice date, payment terms, and VAT rate. Payment terms and VAT rate are pre-filled from the customer if defined there. Changes on the invoice do not affect the default customer settings for future invoices.

You can export the invoice to Fortnox at any time. The invoice will then receive its number, and the Preview button will appear at the top and bottom of the page.
Click Preview to fetch the invoice PDF from Fortnox. If you need to make changes afterward, simply continue working on the invoice, changes are continuously sent to Fortnox.
When it’s time to send the invoice, you have several options:
Choose Print to download the PDF and mark the invoice as sent.
Choose Email to send the invoice by email via Fortnox. Pre-filled information such as subject and message is configured in Fortnox.
Choose E-invoice to send the invoice electronically via Fortnox. This usually requires some configuration in Fortnox.
Choose Print service to send the invoice via Fortnox’s print service. This usually requires some configuration in Fortnox.